Instal and configure JENKINS & SONAR
Instal and configure JENKINS & SONAR
Jenkins is a popular open source CI (Continuous Integration) tool which is widely used for project development, deployment, and automation.
This article will guide you through the process of installing Jenkins on a CentOS 7 server instance. In order to facilitate visitors' access, Nginx will also be installed as the reverse proxy for Jenkins.
Before proceeding, you must have:
- Deployed a CentOS 7 server instance from scratch.
- Logged into your machine as a non-root user with sudo privileges.
3. Update your CentOS 7 system
One of the Linux system administrator's best practices is keeping a system up to date. Install the latest stable packages, then reboot.
sudo yum install epel-release
sudo yum update
sudo reboot
When the reboot finishes, login with the same sudo user.
Before you can install Jenkins, you need to setup a Java virtual machine on your system. Here, let's install the latest OpenJDK Runtime Environment 1.8.0 using YUM:
sudo yum install java-1.8.0-openjdk.x86_64
After the installation, you can confirm it by running the following command:
java -version
This command will tell you about the Java runtime environment that you have installed:
openjdk version "1.8.0_91"
OpenJDK Runtime Environment (build 1.8.0_91-b14)
OpenJDK 64-Bit Server VM (build 25.91-b14, mixed mode)
In order to help Java-based applications locate the Java virtual machine properly, you need to set two environment variables: "JAVA_HOME" and "JRE_HOME".
sudo cp /etc/profile /etc/profile_backup
echo 'export JAVA_HOME=/usr/lib/jvm/jre-1.8.0-openjdk' | sudo tee -a /etc/profile
echo 'export JRE_HOME=/usr/lib/jvm/jre' | sudo tee -a /etc/profile
source /etc/profile
Finally, you can print them for review:
echo $JAVA_HOME
echo $JRE_HOME
Use the official YUM repo to install the latest stable version of Jenkins, which is 2.32.2 at the time of writing:
cd ~
sudo wget -O /etc/yum.repos.d/jenkins.repo http://pkg.jenkins-ci.org/redhat-stable/jenkins.repo
sudo rpm --import http://pkg.jenkins-ci.org/redhat-stable/jenkins-ci.org.key
sudo yum install jenkins
Start the Jenkins service and set it to run at boot time:
sudo service jenkins start
sudo chkconfig jenkins on
In order to allow visitor’s access to Jenkins, you need to allow inbound traffic on port 8080:
sudo firewall-cmd --zone=public --permanent --add-port=8080/tcp
sudo firewall-cmd --reload
Now, test Jenkins by visiting the following address from your web browser:
http://<your-local-server-IP>:8080
.png)
In order to facilitate visitors' access to Jenkins, you can setup an Nginx reverse proxy for Jenkins, so visitors will no longer need to key in the port number 8080 when accessing your Jenkins application.
Install Nginx using YUM:
sudo yum install nginx
Modify the configuration of Nginx:
sudo vi /etc/nginx/nginx.conf
Find the two lines below:
location / {}
Insert the six lines below into the { } segment:
proxy_pass http://127.0.0.1:8080;proxy_redirect off;proxy_set_header Host $host;proxy_set_header X-Real-IP $remote_addr;proxy_set_header X-Forwarded-For $proxy_add_x_forwarded_for;proxy_set_header X-Forwarded-Proto $scheme;
The final result should be:
location / {proxy_pass http://127.0.0.1:8080;proxy_redirect off;proxy_set_header Host $host;proxy_set_header X-Real-IP $remote_addr;proxy_set_header X-Forwarded-For $proxy_add_x_forwarded_for;proxy_set_header X-Forwarded-Proto $scheme;}
Save and quit:
:wq
Start and enable the Nginx service:
sudo systemctl start nginx.servicesudo systemctl enable nginx.service
Allow traffic on port 80:
sudo firewall-cmd --zone=public --permanent --add-service=httpsudo firewall-cmd --reload
Finally, visit the following address from your web browser to confirm your installation:
http://<your-local-server-IP>
.png)
This guide will help you to setup and configure sonarqube on Linux servers (Redhat/Centos 7 versions). Follow the steps given below for the complete sonarqube configuration
1. Setup Sonarqube MYSQL Database
wget http://repo.mysql.com/mysql-community-release-el7-5.noarch.rpmsudo rpm -ivh mysql-community-release-el7-5.noarch.rpmsudo yum update -y
sudo yum install mysql-server
sudo systemctl start mysqld
Set password for yout MYSQl instance using the following command. The command will prompt for current root password, you can hit enter as there is no default password. All the other prompts are self-explanatory.
sudo mysql_secure_installation
Login using MySQL client and check the MySQL engine using the following commands. The storage engine should be InnoDB.
mysql -u root -p
SHOW GLOBAL VARIABLES LIKE 'storage_engine'
CREATE USER 'sonarqube'@'localhost' IDENTIFIED BY 'password';CREATE DATABASE sonarqube;
GRANT ALL PRIVILEGES ON sonarqube.* TO 'sonarqube'@'localhost';
Open /etc/my.cnf file and under [mysqld] section add the query cache parameter. The minimum size should be 15 MB. You can increase the size based on your server type.
query_cache_size = 15M
Download the latest sonarqube installation file to /opt folder. You can get the latest download link from here. http://www.sonarqube.org/downloads/
cd /optsudo wget https://sonarsource.bintray.com/Distribution/sonarqube/sonarqube-6.0.zip
Unzip sonarqube source files and rename the folder.
sudo unzip sonarqube-6.0.zipmv sonarqube-6.0 sonarqube
Open /opt/sonarqube/conf/sonar.properties, uncomment and edit the parameters as shown below. Change the password accordingly.
sonar.jdbc.username=sonarqubesonar.jdbc.password=passwordsonar.jdbc.url=jdbc:mysql://localhost:3306/sonarqube?useUnicode=true&characterEncoding=utf8&rewriteBatchedStatements=true&useConfigs=maxPerformance
By default, sonar will run on 9000. If you want on port 80 or any other port, change the following parameters for accessing the web console on that specific port.
sonar.web.host=0.0.0.0sonar.web.port=80
If you want to access sonarqube some path like http://url:/sonar, change the following parameter.
sonar.web.context=/sonar
To start sonar service, you need to use the script in sonarqube bin directory.
Navigate to the start script directory.
cd /opt/sonarqube/bin/linux-x86-64
Start the sonarqube service.
sudo ./sonar.sh start
Check the application status. If it is in running state, you can access the sonarqube dashboard using the DNS name or Ip address of your server.
sudo ./sonar.sh start
Setting Up Sonarcube As A Service
1. Create a file /etc/init.d/sonar and copy the following content on to the file.
#!/bin/sh## rc file for SonarQube## chkconfig: 345 96 10# description: SonarQube system (www.sonarsource.org)#### BEGIN INIT INFO# Provides: sonar# Required-Start: $network# Required-Stop: $network# Default-Start: 3 4 5# Default-Stop: 0 1 2 6# Short-Description: SonarQube system (www.sonarsource.org)# Description: SonarQube system (www.sonarsource.org)### END INIT INFO/usr/bin/sonar $*
Create a symbolic link for /usr/bin/sonar without sonarqube start scripts in the source file directory. i.e /opt/sonarqube/bin/linux-x86-64
sudo ln -s /opt/sonarqube/bin/linux-x86-64/sonar.sh /usr/bin/sonar
Change the file permissions and add sonar to the boot.
sudo chmod 755 /etc/init.d/sonarsudo chkconfig --add sonar
Once you are done with all the above configurations, you can manage sonar using the following commands.
sudo service sonar startsudo service sonar stopsudo service sonar restart
For sonarqube support, visit this link
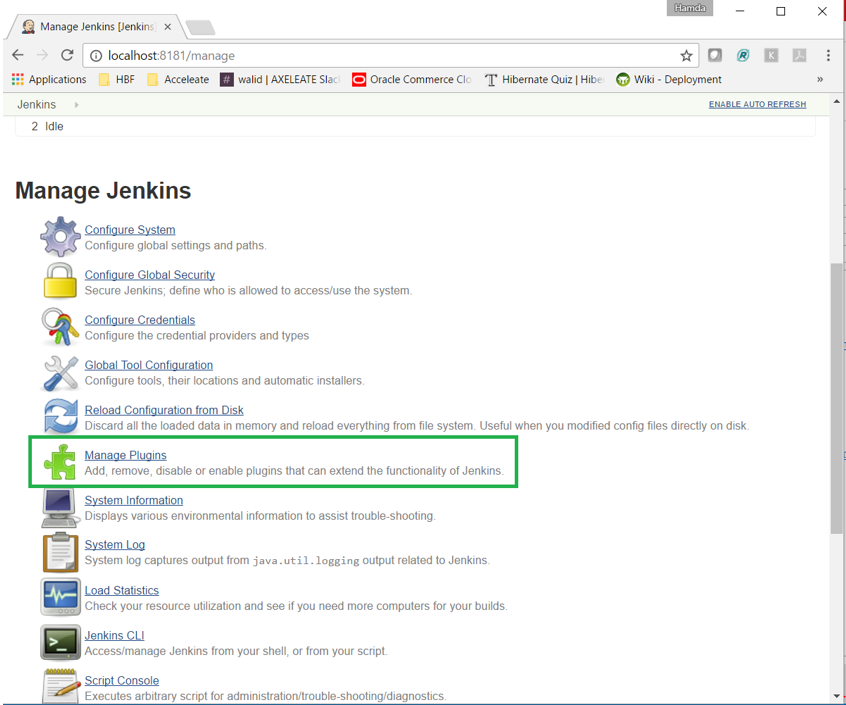
On the first installation, Jenkins suggest a list of plugins that can be used to compile, build and deploy your project.
.png)
From the interface of Jenkins, we can on any time add a new plugin, update or remove an existing plugin
In this interface, user can search and install plugin
.png)
For java project we need to install the following plugins:
- Junit: https://wiki.jenkins-ci.org/display/JENKINS/JUnit+Plugin
- Gradle: https://wiki.jenkins-ci.org/display/JENKINS/Gradle+Plugin
- FindBugs: https://wiki.jenkins-ci.org/display/JENKINS/FindBugs+Plugin
- PMD: https://wiki.jenkins-ci.org/display/JENKINS/PMD+Plugin
- Cobertura: https://wiki.jenkins-ci.org/display/JENKINS/Cobertura+Plugin
- SonarQube : https://wiki.jenkins-ci.org/display/JENKINS/SonarQube+plugin
- Repository Connector: https://wiki.jenkins-ci.org/display/JENKINS/Repository+Connector+Plugin
List of installed plugins
.png)
In our case we will focus on Java project and the configuration between Jenkins/Sonar
Jenkins supports building Java projects since its inception, and for a reason. It’s both the language Jenkins is written in, plus the language in use by many if not all the projects Kohsuke Kawaguchi wanted to watch out when he created the tool many years ago.
If you want to build a Java project, there are a bunch of different options. The most typical ones nowadays are generally Apache Maven, or Gradle.
In any FreeStyle job, as currently Maven is supported in standard, you can use the dedicated step. One advantage is, as for all Jenkins tools, that you can select a specific Maven version and have Jenkins automatically install it on the build node it’s going to run on.
.png)
As the associated plugin is not installed by default, first install the Gradle plugin. Once done, you should be able to add a Gradle step.
.png)
In this section, we configure the global configuration used on all projects, we can configure the path of Java, Maven, Ant, Gradle, Sonarqube.
With Jenkins we can add the path of each tools if already installed on server or add an installer to install the tools
We will describe the step to add the path of JDK (already installed) and a Jenkins installer to install maven
.png)
Maven will be installed from Jenkins installer
.png)
On configuration interface http://localhost:8181/configure we should configure the server url, server user of Sonar
.png)
.png)
Choose Maven Project and configure the different steps to compile project: Source Code management and Build
.png)
On build step, we configure the build step for maven or gradle
.png)
When we execute the build script, a list of action are available on step “Post Steps” to check the quality of code with sonar, execute a sh/ant script.
.png)
And then configure the modules to include on sonar check, the encoding, project type and packages or types to exclude during the check.
.png)
sonar.sourceEncoding=UTF-8sonar.projectName=AxeleateCommercesonar.sources=AxeleateCommerce/src,AxeleateCommerce/sql, AxeleateCommerce/j2ee-appssonar.projectKey=ecomsonar.projectVersion=1.0sonar.java.source=1.8sonar.java.target=1.8sonar.exclusions=*.css, *.js
On sonar administration interface http://localhost:9000/sonar/updatecenter we can add many tools code analysis to sonar, for our project we install and update the list of tools:
- Java: Code Analyzer for Java
- Java Properties: Enables scanning of Java .properties files
- JavaScript: Code Analyzer for JavaScript
- Web: Enables scanning of HTML, and JSP/JSF files
- XML: Enable analysis and reporting on XML files
- Checkstyle: Analyze Java code with Checkstyle
- Cobertura: Get code coverage with Cobertura
- PMD: Analyze Java code with PMD
- CSS / SCSS / Less : Enables analysis of CSS and Less files
.png)
From http://venus.acceleate.com:9000/sonar/profiles page we can check the list of rules used by sonar, activate or deactivate a profile
.png)
When the task Post-Action is executed from Jenkins, sonar will check the code and apply each rule activated for the project.
On sonar we can have the dashboard that display the detail of code check: number of bugs (sonar manage the process of bug fixing with multiple status), number of vulnerabilities, code duplication and percent of tested functions and lines of code.
.png)
On sonar dashboard we can configure the layout of home page, display one or more widget
.png)
Change to port of Jenkins services, edit the configuration file located under “/etc/sysconfig/Jenkins”
sudo vim /etc/sysconfig/jenkins
Change the property “JENKINS_PORT” to 8181 and restart the service
JENKINS_PORT="8181"
sudo service jenkins restart
Category: Technology & Innovation
0 Comments